
Mastering oysters starts with mastering the knife.
Whether you’re opening your first dozen or preparing hundreds on a Saturday night, the right oyster knife changes everything — safety, speed, technique, and the final presentation on the half shell. This guide is the most complete, chef-informed oyster knife resource available online, built to help you choose the perfect tool and shuck with confidence.
Use the table of contents below to jump to any section.
CHAPTER 1 — THE GOSPEL OF THE OYSTER KNIFE
Where every great shucker’s journey begins.
There’s a particular kind of quiet behind a raw bar — the kind that settles over crushed ice, steel trays, and the cold confidence of someone about to open a perfect oyster. It’s a quiet that feels like tidewater breath, like anticipation, like the moment before steel meets shell.
Anyone who has ever shucked in a real kitchen knows this moment.
That first oyster of the night decides everything.
When your knife hits the hinge, you immediately learn whether you’re working with your tool… or fighting against it.
A great oyster knife makes you feel steady.
It gives you leverage, control, and calm.
It makes you fearless.
A bad oyster knife makes you tense.
It slips, flexes the wrong way, or pushes back.
It makes you hesitate — and hesitation is how hands get cut and oysters get ruined.
I’ve opened oysters everywhere:
Cold New England raw bars in winter.
Gulf coast shacks in the heat.
Fine-dining kitchens with tickets stacked to the ceiling.
Oyster farm docks at sunrise.
Competition tables with a crowd watching.
And backyard cookouts with friends who think six dozen is “a light snack.”
In all those places, one truth never changed:
Your oyster knife defines your confidence.
Your confidence defines your shuck.
And your shuck defines the oyster.
This guide exists because you deserve to open oysters with skill, safety, and respect — not struggle.
This is not a casual review or a “top 10 picks” list.
This is the Raw Bar Bible — the most complete, chef-informed, oyster-obsessed guide ever written on oyster knives.
By the end, you’ll know exactly which knife belongs in your hand…
and how to make it perform like an extension of your will.
Welcome to the gospel of steel and shell.
Let’s begin.
CHAPTER 2 — THE ANATOMY OF AN OYSTER KNIFE
Because understanding the tool elevates the craft.
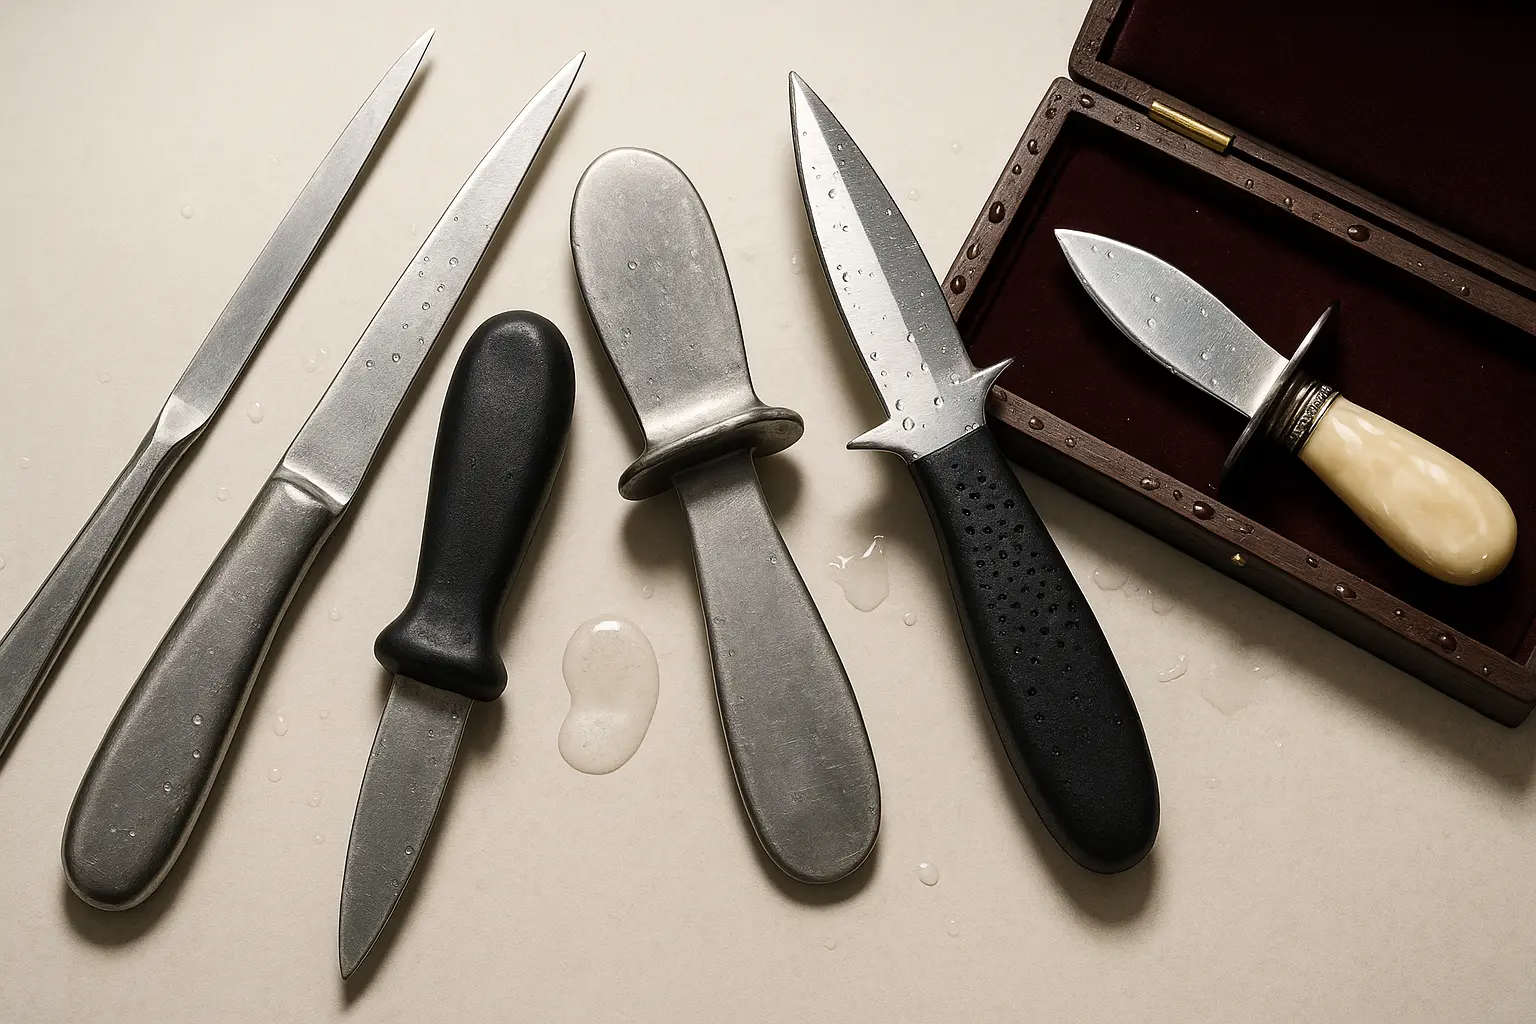
The oyster knife is one of the simplest tools in the culinary world — and also one of the most misunderstood. Unlike a chef’s knife, it’s not designed to slice, chop, or finesse. Its entire purpose is leverage. Force. Control. Precision under pressure.
To understand oyster knives, you need to understand physics, anatomy, and oyster biology all at once.
Here’s what actually matters.
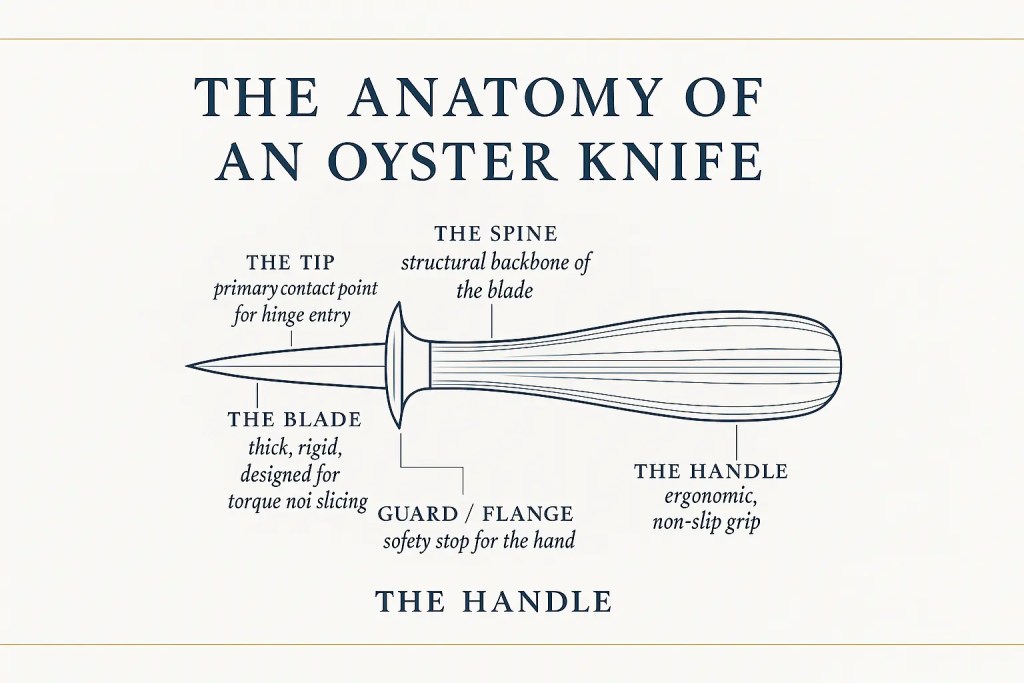
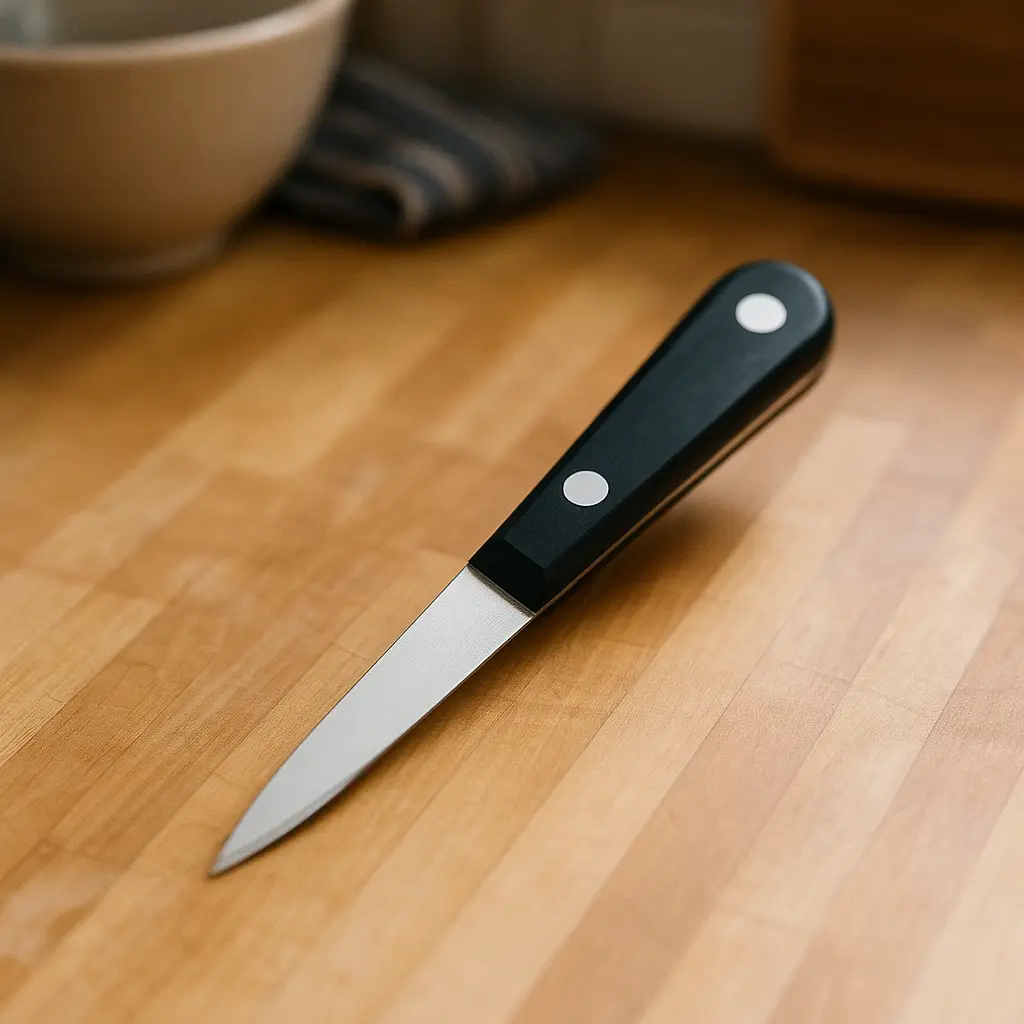
THE TIP — The Soul of the Knife
This is the first contact point with the hinge — the place where strength meets subtlety.
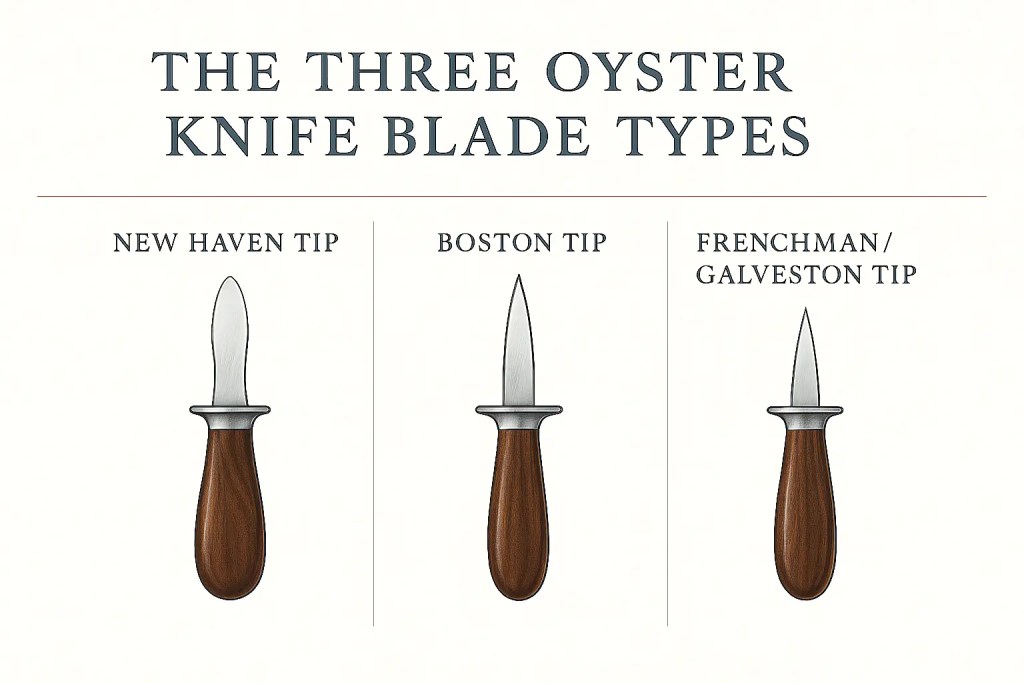
The three major tip styles:
1. New Haven Tip (curved upward) — The Standard
This is the gold standard on the East Coast.
That slight curve makes the hinge pop feel effortless.
It’s the most versatile, the most forgiving, and the hardest to screw up.
2. Boston Style Tip (straight spear)
The beginner-friendly classic.
Simple. Strong. Predictable.
Ideal for learning technique without worrying about over-angling the blade.
3. Frenchman / Galveston Style Tip (narrow, tapered)
This is for finesse.
smaller oysters.
delicate shells.
side-shucking when you want a clean presentation.
THE BLADE — The Engine of Leverage
Oyster knife blades don’t “cut” — they twist.
Blade qualities that matter:
- Thickness: More strength, less flex.
- Taper: Helps with delicate shells.
- Length: Short = more control. Long = more torque.
- Material: Stainless steel or high-carbon stainless for durability.
If the blade flexes too much, you lose power.
If it flexes too little, you lose feel.
Balance is everything.
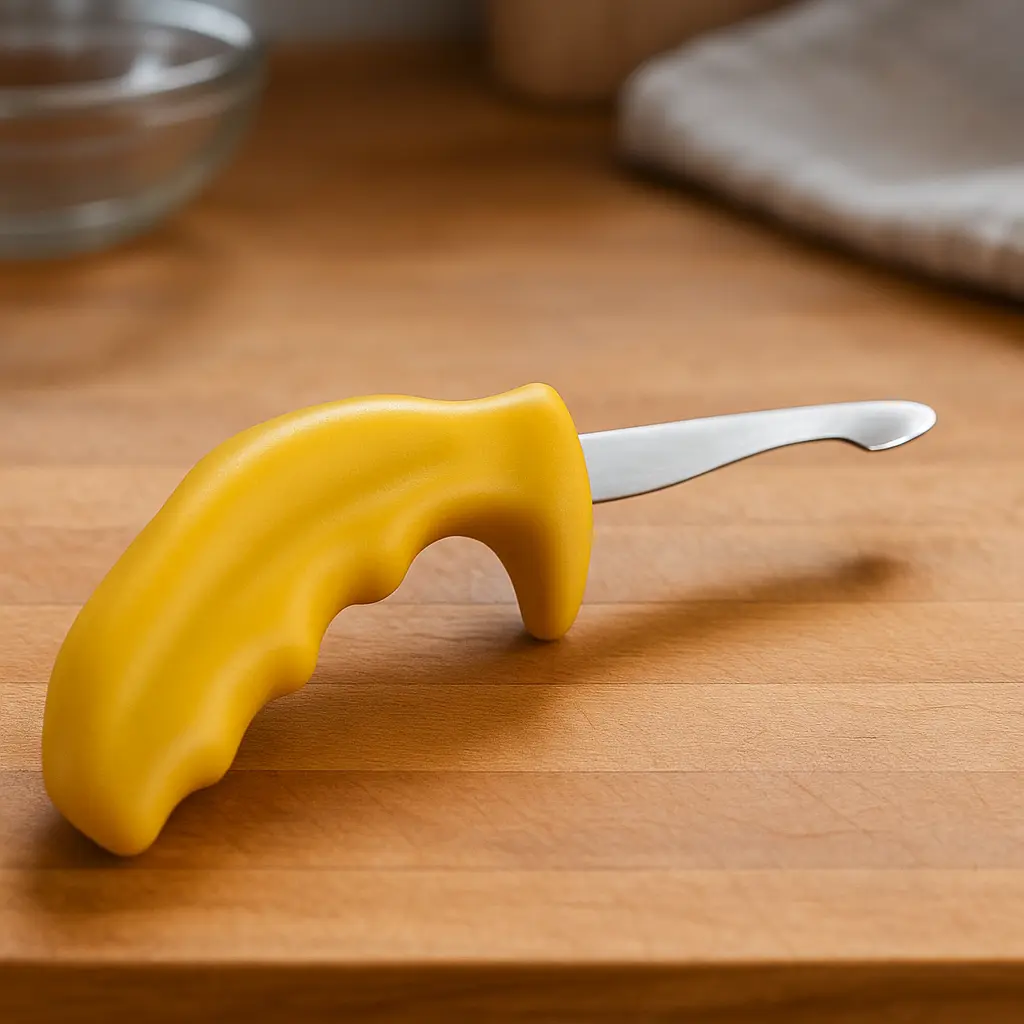
THE HANDLE — Your Safety System
A handle is the difference between a confident pop… and a hospital visit.
You want:
- Non-slip grip
- Ergonomic shaping for thumb stability
- A guard or flange
- Comfort even with wet hands
- Durability over time
A good handle makes you feel anchored.
A bad handle makes you second-guess every twist.
THE SPINE — The Backbone
This determines how the blade reacts under pressure.
A proper oyster knife spine should:
- Support torque
- Resist bending
- Transmit force cleanly
- Stay rigid without being brittle
This is where cheap knives fail.
THE BALANCE — The Feeling in Your Hand
You know a good oyster knife the instant you pick it up.
It feels centered.
Solid.
Confident.
Like it wants to work with you.
And that’s the entire point of knife anatomy — the tool should disappear in your hand, leaving nothing but technique.
CHAPTER 3 — THE OYSTERS THEMSELVES
Because the species dictates the blade.
Before you choose your knife, you need to understand the shell you’re opening.
Different oysters demand different strategies — and therefore different tools.
This is something beginners never learn and experts never forget.
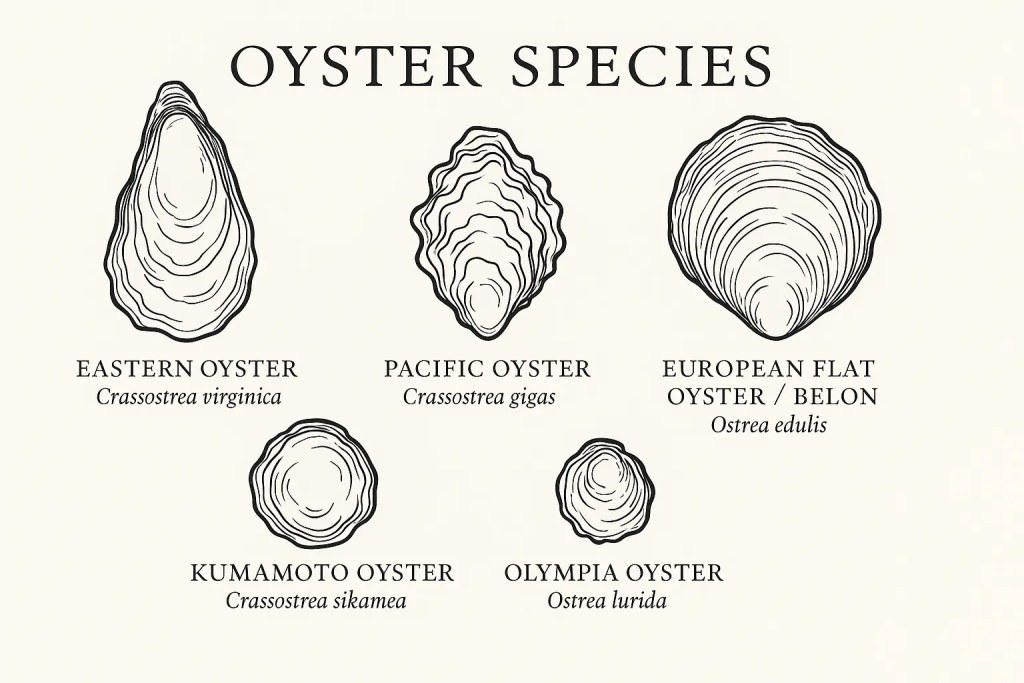
EAST COAST OYSTERS — Thick, Rugged, Full of Attitude
Blue Points, Wellfleets, Malpeques, Chincoteagues…
These oysters tend to be:
- thick-shelled
- hinge-heavy
- strongly muscled
- resistant to torque
They give you pushback.
That’s their job.
They require:
- strong, reliable knives
- New Haven or Boston–style tips
- high leverage
- firm, non-slip handles
This is where the classic East Coast tools shine —
you want something that can seat in the hinge and take a serious twist without flexing or failing.
WEST COAST OYSTERS — Beautiful, Deep-Cupped, Delicate
Kumamotos, Pacifics, Olympias…
These oysters are:
- petite
- deep-cupped
- more fragile
- irregular in shape
You don’t bully these — you finesse them.
They require:
- precision tools
- narrow, tapered tips
- shorter blades
- more subtle hand pressure
This is where French-style or Galveston-style blades dominate.
You’re not just opening the shell — you’re protecting presentation.
GULF OYSTERS — Big, Bold, Briny
The Gulf grows big, lush oysters with thick shells and wide, powerful hinges.
They’re:
- large format
- heavy in the hand
- strongly reinforced at the hinge
They demand:
- sturdy blades
- strong spines
- excellent torque transfer
- a knife built unapologetically for force
A weak blade won’t survive Gulf oysters.
They expose cheap steel instantly.
EUROPEAN FLATS / BELONS — The Wild Card
If East Coast oysters are rugged…
and West Coast oysters are elegant…
European flats are chaotic geniuses.
- dense shells
- wild, unforgiving hinges
- a pop that never feels quite the same twice
They are the oysters that test both your knife and your technique.
They require:
- champion-grade knives
- perfect tip geometry
- high control
- high strength
Only a few knives handle Belons gracefully.
Those are the blades we’ll talk about soon.
WHAT THIS MEANS FOR YOUR KNIFE RACK
One knife can open any oyster in theory.
In practice, chefs build a small lineup:
- a workhorse East Coast knife for thick, hinge-heavy shells
- a precision West Coast knife for small, fragile, deep-cupped oysters
- a tank for Gulf monsters and Belons
The species tells you which blade to reach for
long before you even touch the hinge.
CHAPTER 4 — EAST COAST VS. WEST COAST SHUCKING
Two coasts, two cultures, two philosophies of opening the ocean.
Walk into a raw bar in Maine and ask ten shuckers how they open an oyster — you’ll get ten versions of the same method: hinge attack, strong twist, clean pop, top shell off in one motion.
Walk into a raw bar in Seattle and do the same — you’ll see a different world entirely. Smaller oysters, deeper cups, intricate angles, and a finesse-first approach that feels almost surgical.
Shucking isn’t just a technique.
It’s a regional language.
And every oyster knife performs differently depending on the dialect.
Let’s break down the major styles.
EAST COAST SHUCKING — Strength, Angle, Leverage
East Coast oysters have:
- Thick shells
- Strong, defined hinges
- Heavier muscle
- A geometry that rewards power + precision
The Technique
- Enter the hinge with the knife tip.
- Apply torque with a confident twist.
- Pop upward — not sideways.
- Rotate the blade to split the shells.
- Swipe the top muscle clean.
Why It Works
This approach takes advantage of the oyster’s natural hinge structure. It’s fast. Efficient. Ideal for service volume.
Best Knife Types
- New Haven
- Boston style
- Hybrid blades with strong spines
- Medium-length blades (2.5–3.5 in.)
Best For
- Blue Points
- Malpeques
- Wellfleets
- Chincoteagues
- Any large Atlantic oyster
WEST COAST SHUCKING — Precision, Control, Craft
West Coast oysters require respect.
Deep cups.
Delicate shells.
Smaller hinges.
Flavor profiles that reward a clean presentation.
The Technique
- Insert the knife near the hinge, but with less force.
- Slowly “find” the seam instead of attacking it.
- Gently rock forward to open the cup.
- Lift the top shell carefully — preserving liquor.
- Slice the adductor with finesse.
Why It Works
West Coast oysters are too fragile for brute force.
Precision prevents shell fragments and protects the deep-cupped interior.
Best Knife Types
- Frenchman / Galveston
- Narrow blades
- Shorter, tapered knives
- High control handles
Best For
- Kumamotos
- Olympias
- Pacific oysters
- Deep-cup varietals
THE HYBRID APPROACH — The Modern Shucker’s Method
Many chefs now use a mixed technique because:
- East Coast oysters are appearing on West Coast menus
- West Coast oysters ship everywhere
- Raw bars want consistency
- Knife designs have evolved
This method uses:
- East Coast hinge entry
- West Coast blade control
- Cleaner muscle cuts
- Minimal shell breakage
The result?
A presentation that satisfies both coasts:
fast and beautiful.
Deep Dive Library
Comprehensive Oyster Guides
Chef-written breakdowns of the world’s most important oysters — flavor, regions, farming, and how to actually use them on the plate.
Everything You Need to Know About Eastern Oysters
Pacific Oysters (Crassostrea gigas)
Kumamoto Oysters (Crassostrea sikamea)
European Flat Oysters (Ostrea edulis)
Olympia Oysters (Ostrea lurida)
Each guide includes a full written breakdown plus a video walkthrough.
CHAPTER 5 — THE PSYCHOLOGY OF THE SHUCK
Why confidence, rhythm, and respect matter as much as technique.
A great shuck isn’t just mechanical — it’s mental.
The best shuckers in the world don’t rush, don’t force, and don’t overthink. They enter a flow state: focused, calm, precise. Every oyster becomes a small negotiation, and every knife movement carries intention.
When you understand the psychology of shucking, everything becomes easier.
CONFIDENCE — The Foundation
An oyster can feel hesitation.
Hesitation leads to:
- wrong angles
- slipping grips
- uneven pressure
- shell cracks
- injuries
A confident shucker applies deliberate pressure — never more than necessary, never less than required.
Confidence is built from:
- a great knife
- repetition
- understanding the hinge
- trusting your hand
RESPECT FOR THE SHELL — The Mindset
If you rush, the oyster punishes you.
If you fight the shell, it pushes back.
The pros know this. They don’t “attack” oysters — they open them.
This subtle shift in mindset reduces:
- force
- breakage
- mess
- fear
THE FEEL — Shucking Is Tactile
A good shucker feels the hinge give way before it actually pops.
You can’t describe it.
You can only learn it.
Great knives transmit that micro-feedback through the spine and handle — bad knives numb it.
THE BREATH — The Secret No One Talks About
Most professional shuckers inhale before the hinge
…
then exhale during the twist.
It’s automatic.
It’s grounding.
It syncs your body with your technique.
Even beginners improve instantly when they adopt the rhythm.
THE FLOW — The Ultimate Goal
Once you’ve opened hundreds (or thousands) of oysters, you reach a point where:
- the hinge finds your knife
- your blade knows where to go
- your twist is instinct
- your pace is stable
- your movement is economical
You no longer “shuck oysters.”
You move through oysters.
This is the difference between a hobbyist and a craftsperson.
CHAPTER 6 — THE ELITE 8: DEEP-DIVE REVIEWS
The true top oyster knives of 2025 — and what each one is actually built for.
Now that you understand oyster anatomy, species, and regional shucking differences, we can evaluate the knives that actually matter. These eight tools represent the best balance of performance, ergonomics, durability, and real-world testing — from home kitchens to raw bars to competition stages.
Each deep dive includes:
- Blade style
- Best oyster species
- Best shucking style
- Pros / Cons
- Chef commentary
- Who it’s for
- Why it earns its ranking
Let’s dig in.
Dexter-Russell 2.75" New Haven Style Oyster Knife
The East Coast hinge killer every prep cook recognizes instantly.

The Dexter New Haven is the American raw-bar baseline. The short curved tip finds hinges fast, the stiff spine lets you lean into brutal shells, and the price means you can stock a handful without stressing.
- Curved New Haven hinge tip
- Short 2.75" blade for close control
- Stiff spine for aggressive torque
- High-carbon Dexsteel that shrugs off abuse
Line cooks, raw-bar crews, serious home shuckers who want a true workhorse.
OXO Good Grips Stainless Steel Oyster Knife
The comfort king for home shuckers and cautious beginners.
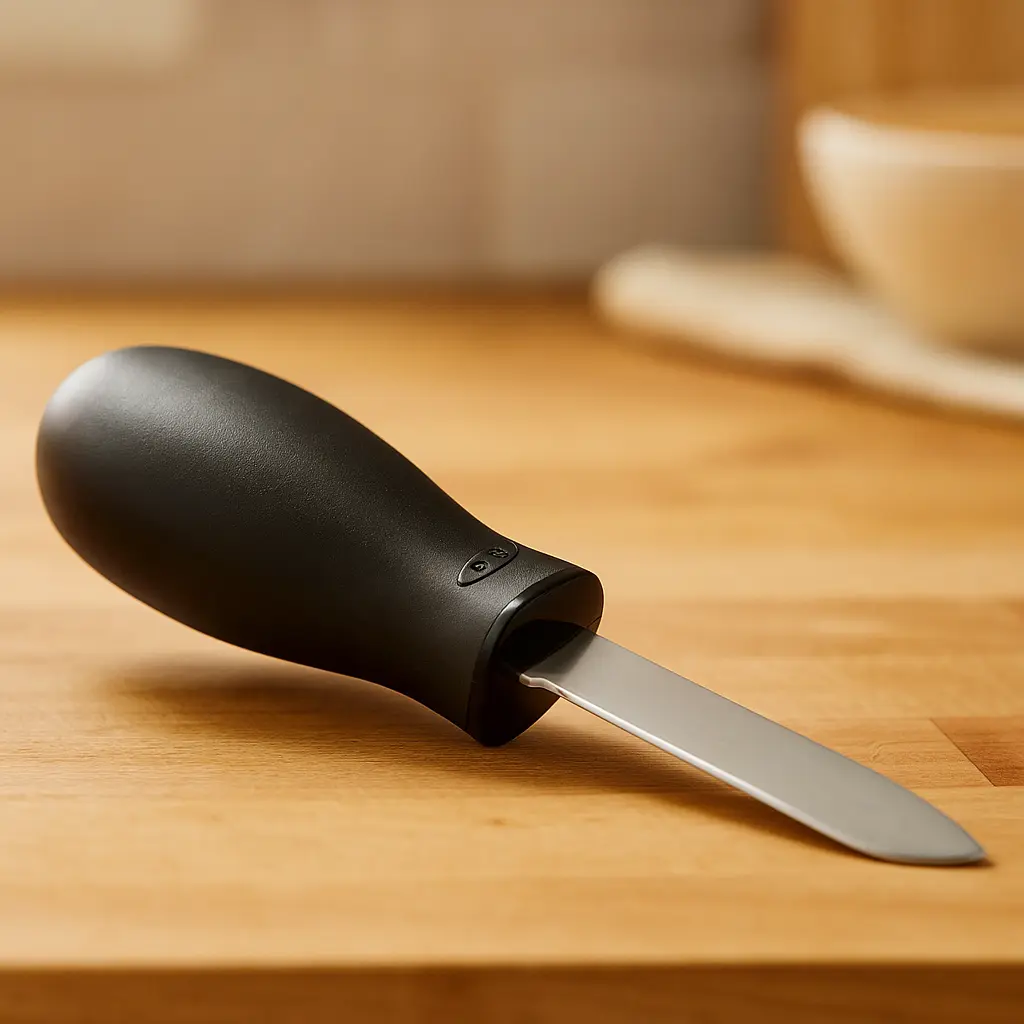
OXO built this knife around safety and comfort: a thick, non-slip handle that’s hard to drop, and a forgiving blade that feels much less scary than a razor-honed spear point.
- Short, stout stainless blade with a softened point
- Neutral geometry that works for hinge or side entry
- Full bolster transitioning into a padded, grippy handle
Home cooks, party hosts, and anyone whose priority is “don’t stab myself, just get these open.”
Messermeister 6.5" Oyster Knife – Thumb Fin
The competition-grade instrument for fast, precise shucking.
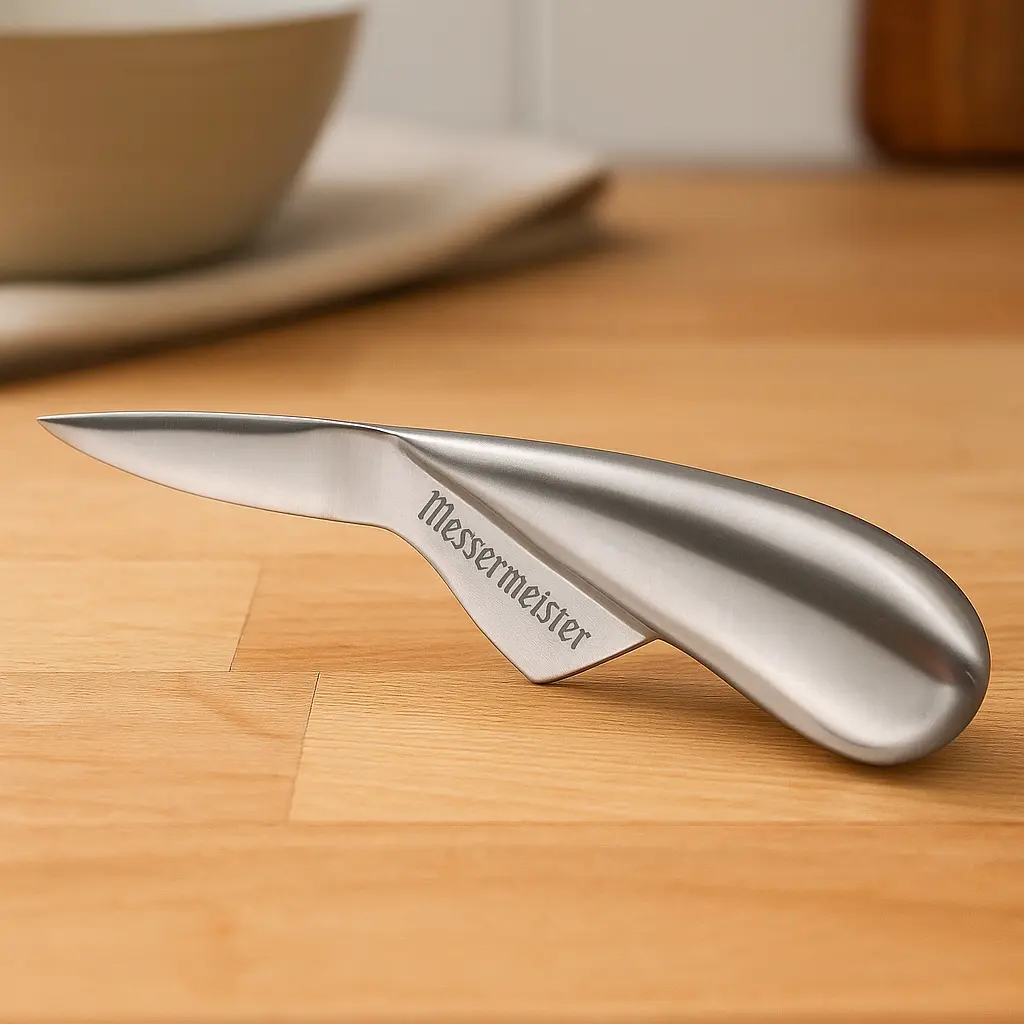
Designed with input from champion shuckers, this blade turns torque into clean, controlled movement. The thumb fin and reinforced spine lock your grip in place and let you attack brutal East Coast hinges without fear.
- Hybrid New Haven / modern geometry
- Reinforced spine engineered for heavy torque
- Stable tip that finds the hinge repeatably
- Optimized for thick East Coast oysters
Chefs, competitive shuckers, and enthusiasts who want one high-end knife that can take real abuse.
F. Dick 3" Oyster Knife
Compact, surgical, and brutally honest about your technique.
F. Dick brings butcher-knife heritage into oyster work: a short spear-point blade, almost no flex, and direct feedback that makes fast, clean openings feel automatic once you’re dialed in.
- Short spear-point blade for pinpoint hinge work
- German stainless with excellent edge stability
- Minimal flex for very direct power transfer
Experienced shuckers who want compact speed and razor-clean presentation.
Mercer Culinary Boston Style Oyster Knife
Classic Boston pattern side-entry at a budget price.
Mercer’s take on the Boston pattern is all about sliding in at the side and riding the shell. The poly handle cleans easily, the blade holds up to abuse, and the price makes it realistic to keep a full rack on the cold line.
- Straight Boston pattern for shell-riding side entry
- High-carbon Japanese steel for a tougher edge
- Moderate flex that helps hug the shell instead of crushing it
Training programs, high-turnover raw bars, and value-driven seafood houses.
danco ECO-1 8.5" Oyster Knife
Big leverage, recycled materials, built for ugly Gulf shells.
The ECO-1’s extra-long blade gives you leverage against big, rock-like oysters that would destroy daintier knives. Pair that with recycled materials and you get a tool that feels tough and a little more planet-friendly.
- Extra-long prying blade for maximum leverage
- Recycled stainless with a workmanlike grind
- Moderate point that can do hinge or side entry with practice
Gulf-focused restaurants, outdoor event crews, and anyone constantly wrestling jumbo, stubborn shells.
R. Murphy / Ramelson Duxbury Oyster Knife
New England heritage with serious raw-bar credibility.
With its broad, rounded tip and compact blade, the Duxbury feels planted and confident in the hinge. It’s a pattern refined not in design studios but over generations of Massachusetts shuckers.
- Short, broad blade with a slightly rounded tip
- High-carbon stainless that sharpens easily
- Minimal flex for strong, predictable hinge pressure
New England-focused raw bars and anyone who wants their tools to feel like part of the regional story.
Swissmar Shucker Paddy Original Oyster Knife
Pistol-grip, side-entry ergonomics straight from a world champion.
Designed with champion shucker Patrick McMurray, the Shucker Paddy’s offset “pistol” handle and curved blade are tuned for side-entry work. Once you learn the angle, it feels almost like cheating: full cups, minimal shell chatter, and happy wrists.
- 3" curved blade with offset pistol angle
- Moderately thin spine for flex and tactile feedback
- Tip geometry optimized to skim between shell layers
Modern raw bars, side-entry fans, and shuckers chasing both speed and ergonomics.
CHAPTER 7 — HOW TO CHOOSE THE PERFECT KNIFE
Match your blade to your oysters, your style, and your confidence.
Choosing an oyster knife isn’t about price.
It’s about purpose.
Match your blade to your oysters, your style, and your confidence.
Choosing an oyster knife isn’t about price — it’s about purpose. Use this guide to match your oyster region, experience level, and personal shucking style with the blade that will help you open oysters faster, safer, and cleaner.
Start with where your oysters come from, layer in your experience, then choose the style that feels natural in your hand.
Affiliate notice: Some recommendations include affiliate links. If you make a purchase, I may earn a small commission at no extra cost to you.
Choose based on your oyster region
Shell thickness and hinge density vary dramatically by region. Pick the knife designed for your coast’s oysters and you’ll open cleaner with less force.
Choose based on your experience level
Your skill determines how much blade aggressiveness you can control. As you level up, you’ll unlock more speed and precision.
Choose based on your shucking style
Don’t fight your natural mechanics — pick the blade that works with your movement, not against it.
The right knife should disappear in your hand.
Recommendations get you close — feel closes the deal. When you wrap your hand around the handle, the knife should feel centered, stable, and ready to move with you. If a knife feels twitchy, slippery, or forces you to tense up, your technique will suffer and you’ll fatigue faster.
When the knife feels natural, you’re no longer thinking about the blade — only the oyster.
- ✓Centered — Not front-heavy or unstable.
- ✓Balanced — Wrist stays relaxed during prying.
- ✓Textured — Grip stays secure when wet.
- ✓Controlled — Small angle adjustments feel precise.
- ✓Natural — The knife feels like an extension of your hand.
CHAPTER 8 — THE SHUCKER’S TOOLKIT
Beyond the knife — every serious oyster lover’s essential gear.
You can shuck an oyster with nothing but a great knife.
But if you want to shuck cleaner, safer, faster, and with better presentation, a few pieces of gear take you from beginner to pro immediately.
This is your oyster prep mise en place — the tools that elevate everything.
Beyond the knife: gear that completes your oyster station.
These are the tools that make shucking cleaner, safer, faster, and prettier. Think of them as your oyster mise en place — the quiet gear that makes every tray look intentional.
Some links below are affiliate links. If you buy through them, I may earn a small commission at no extra cost to you.
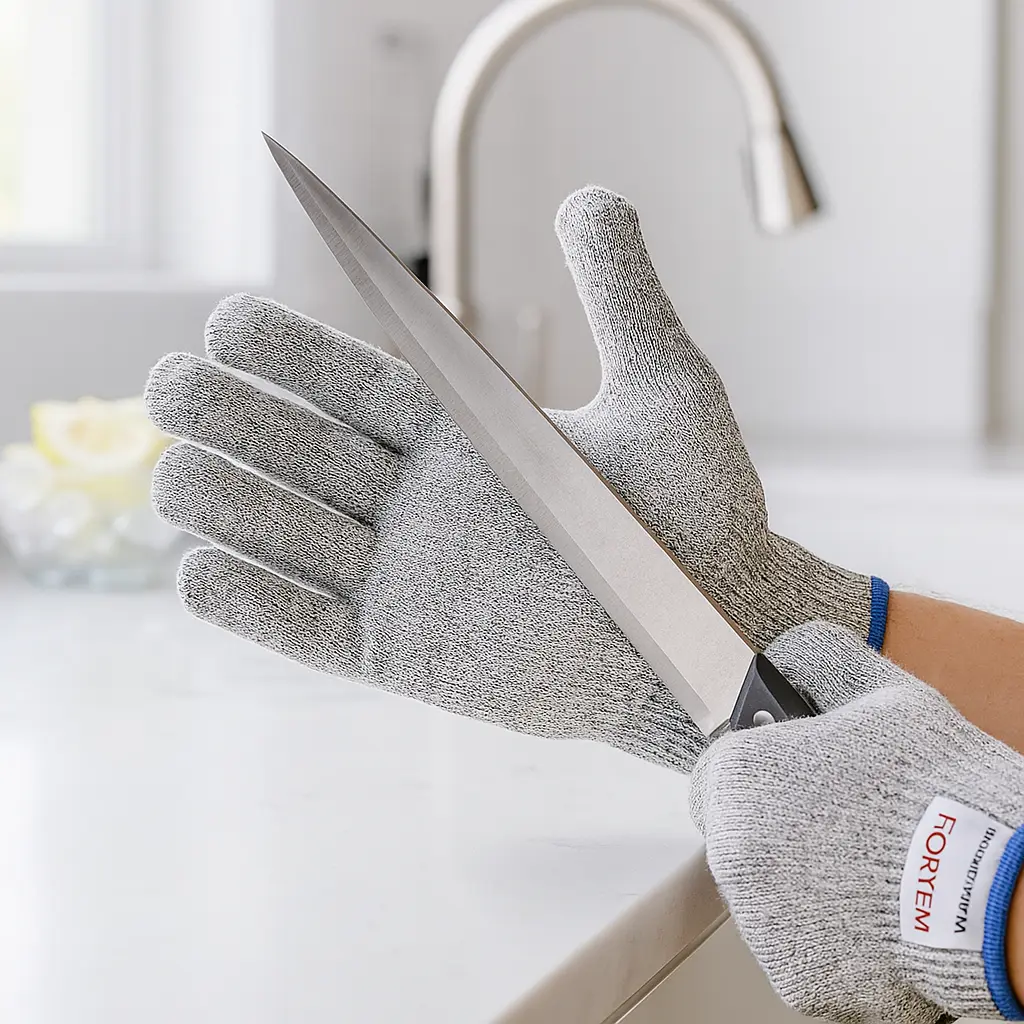
FORTEM Cut Resistant Gloves
 Safety essential
Even pros reach for a glove when the hinges get brutal or the tickets stack up. These FORTEM gloves give you serious cut protection without feeling like armor — you still get grip, control, and feedback from the shell.
- ANSI-rated cut protection for real-world shucking.
- Nitrile-coated palm for wet, slippery shells.
- Snug fit that won’t twist or bunch under pressure.
- Machine-washable, so they can live on your rail.
Jean Dubost Oyster Opener with Olive Wood Board
 Station upgrade
This Jean Dubost set puts your opener and oyster exactly where they belong — locked into a groove on a beautiful olive wood board. It’s functional shucking leverage and instant tableside presentation in one piece.
- Carved cradle holds the oyster steady while you work.
- Olive wood board doubles as serving piece for 2–4 oysters.
- Classic French-style opener with comfortable handle.
- Looks like it belongs in a bistro, not a gadget drawer.
American Metalcraft 16" Aluminum Seafood Tray
 Raw bar classic
This is the classic aluminum tray you see piled with crushed ice and shellfish in raw bars. It’s wide enough for a dozen oysters on ice, plus lemon wedges and a ramekin or two of mignonette.
- 16" diameter — ideal for 12–18 oysters on ice.
- Lightweight aluminum: easy to carry, chills fast.
- Rim helps keep ice and shells where they belong.
- Stacks easily if you ever scale up to party service.
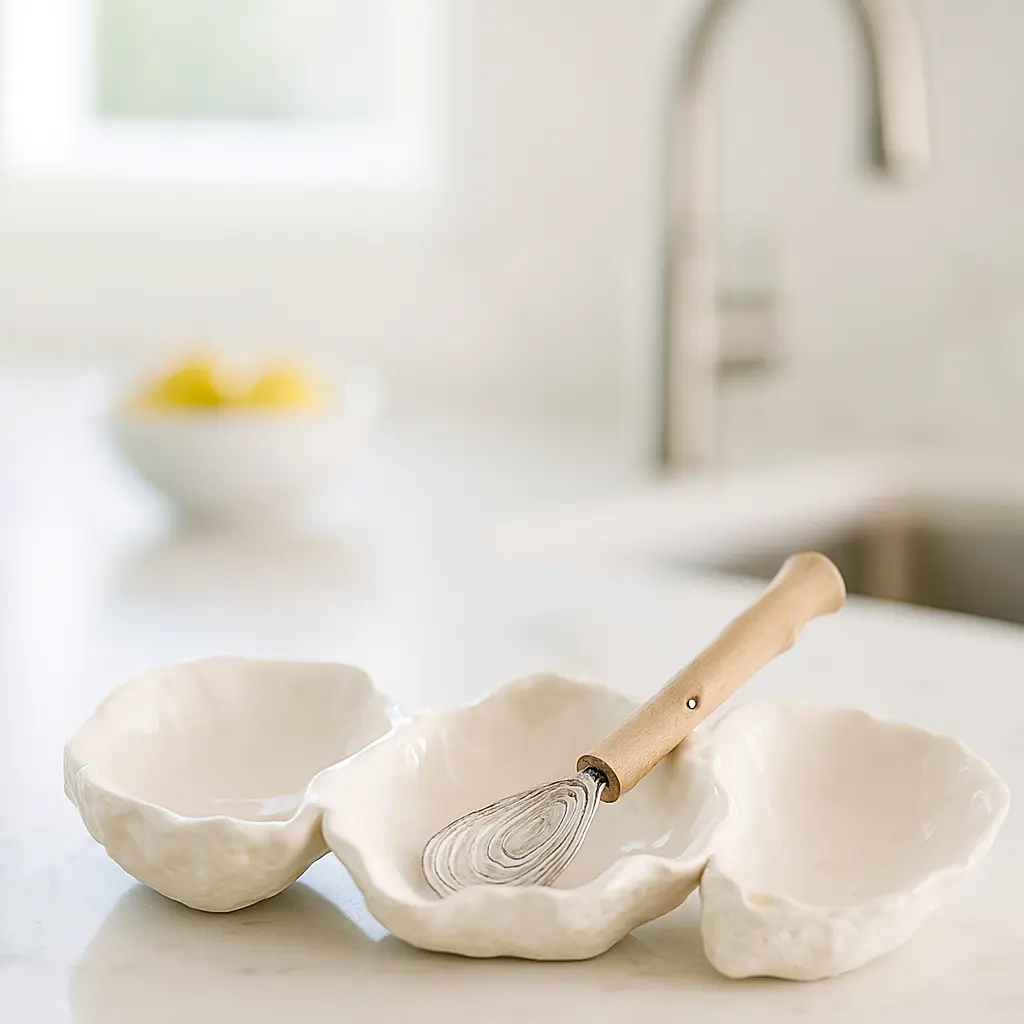
Mud Pie Oyster Shaped Triple Dip & Serving Set
 Sauce station
Your knife work can be flawless, but the table feels unfinished without a proper sauce setup. This triple dip tray keeps your mignonette, cocktail sauce, and hot sauce together in one oyster-shaped piece.
- Three wells sized perfectly for sauces and condiments.
- Oyster-shaped design ties directly into the theme.
- White ceramic works with any plateware or tray.
- Great host gift for anyone who already owns a knife.
Mud Pie Oyster Server Set
 Showpiece platter
When you want the tray itself to be a statement piece, this Mud Pie server set delivers. Load it with ice and oysters, or use it for shells and garnishes while your main tray handles volume.
- 10½" round server with matching 5½" spoon.
- Oyster-inspired design feels coastal without being kitsch.
- Works as a solo platter or alongside a big aluminum tray.
- Instantly reads as “gift-ready” right out of the box.
CHAPTER 9 — HOW TO ACTUALLY SHUCK LIKE A PRO
The real technique, broken down step-by-step with chef clarity.
Ask ten chefs how to shuck an oyster and every answer sounds similar — but the nuance is where the expertise lives.
Here is the true, chef-level, safe, efficient method.
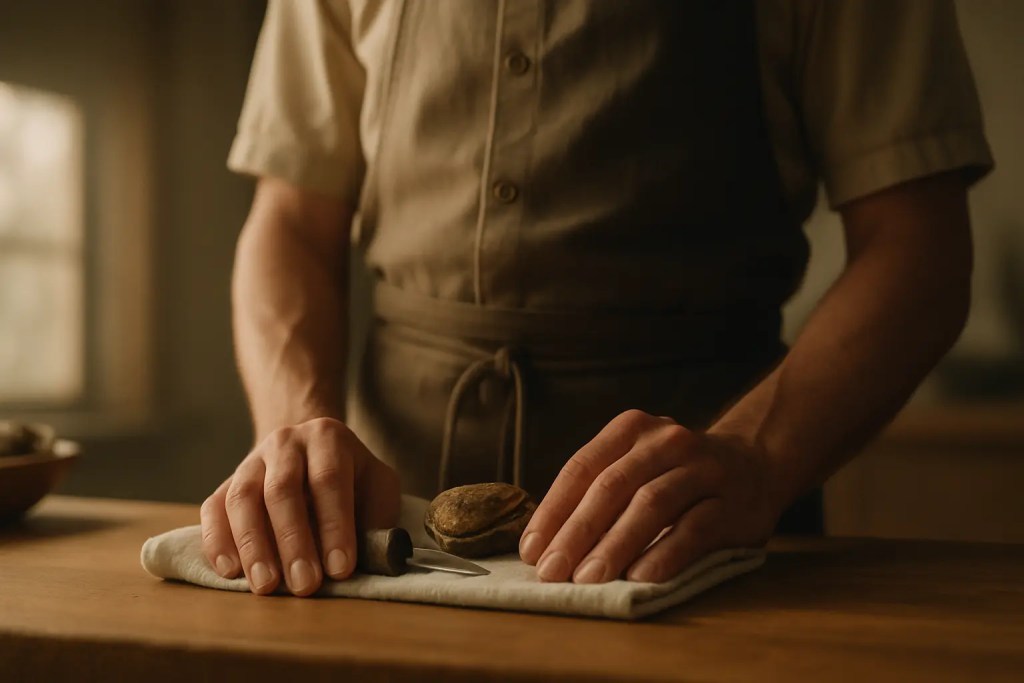
Step 1 — Anchor the Oyster
Place the oyster:
- hinge facing you
- cup side down
- flatter side up
- on a towel or board
Your non-knife hand stabilizes it gently — don’t crush it.
Step 2 — Find the Hinge
The hinge is not a crack.
It’s a muscular joint where the shells meet.
Insert the knife tip into the hinge at a slight downward angle.
Don’t push.
Let the knife settle into the hinge.
Step 3 — Twist, Don’t Stab
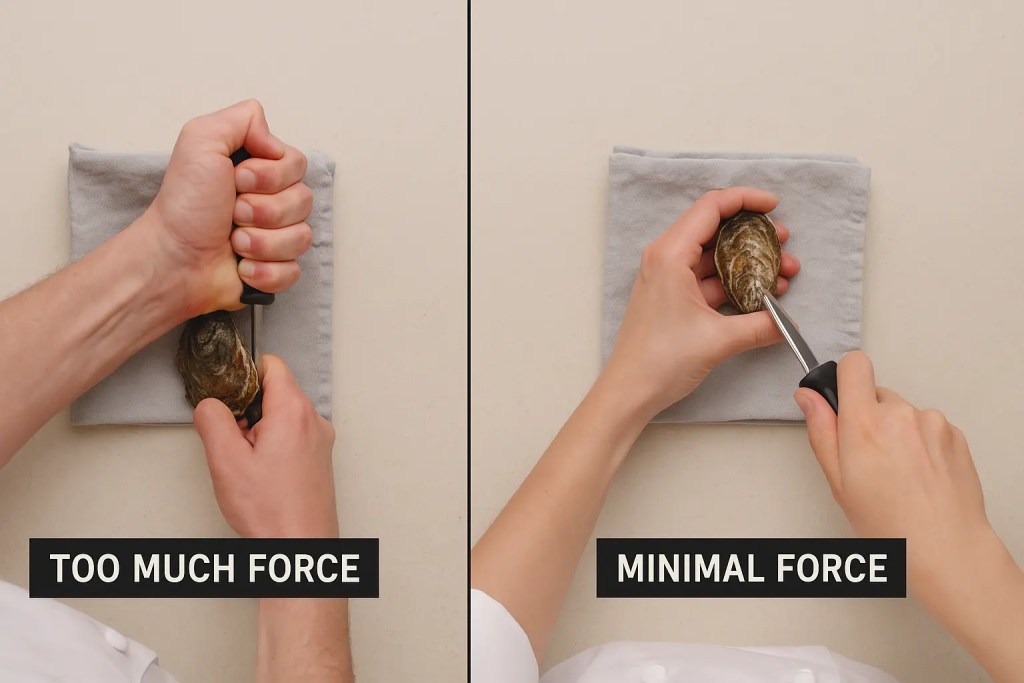
This is the mistake almost everyone makes: pushing too hard.
The right movement is a controlled, confident twist, NOT force.
When the hinge releases, you’ll feel a satisfying “give.”
Step 4 — Clean the Adductor
Slide the knife along the top shell to cleanly separate the adductor muscle.
Then repeat under the oyster to release it fully.
This is what gives that perfect, “floating” presentation.
Step 5 — Reveal And Preserve Liquor
Liquor is flavor, terroir, and life.
A good shucker keeps it intact.
This is why towel stability and blade control matter — jerky movements spill liquor.
Step 6 — Inspect
Check for:
- Shell fragments
- Mud
- Broken edges
A clean oyster is a sign of respect — for the oyster and the guest.
Bonus Step — Develop Your Rhythm
Professional shuckers move like dancers:
- consistent angle
- consistent grip
- consistent twist
- consistent lift
Find your rhythm, and your oysters will open clean every time.
CHAPTER 10 — SAFETY, CUTS, AND THE MISTAKES THAT CAUSE INJURIES
The chapter every beginner skips — and every pro never forgets.
Most oyster-related injuries come from:
- too much force
- wrong angle
- slippery handles
- dull knives
- rushing
- misunderstanding the hinge
This chapter protects hands — and confidence.
THE THREE MOST COMMON INJURIES
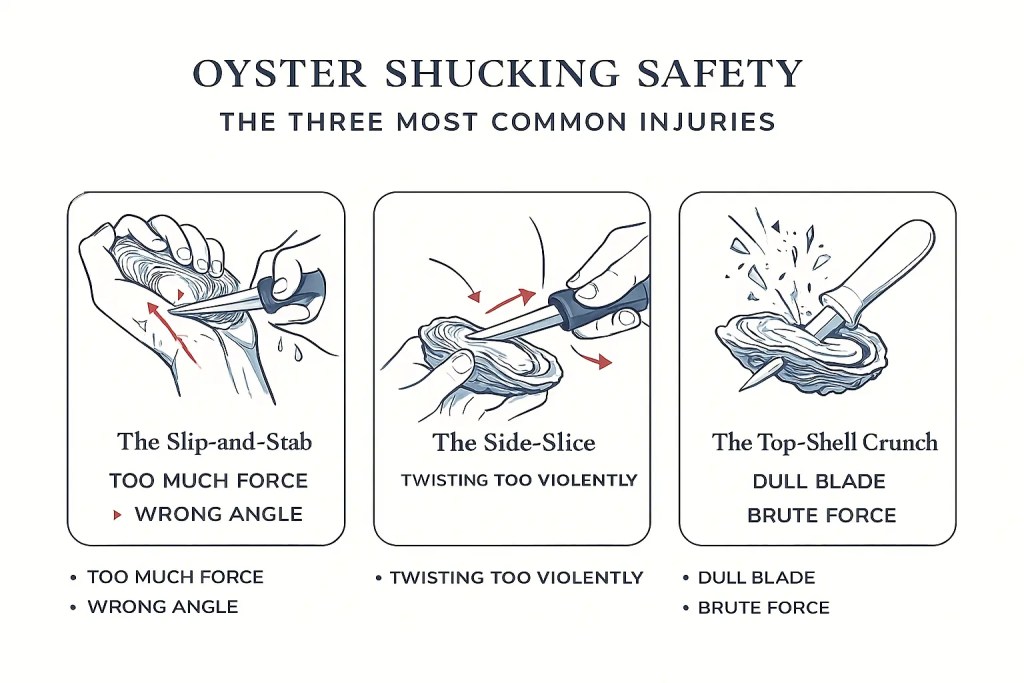
1. The Slip-and-Stab
Knife slips past the hinge → straight into the palm.
This happens because of:
- too much pressure
- bad knife angle
- wet hands
- wrong handle shape
Cut-resistant gloves prevent this entirely.
2. The Side-Slice
Knife pops out sideways → slashes the side of the hand.
This is usually caused by:
- over-angling the tip
- twisting too violently
- brittle cheap knives
A stable board and good blade stiffness solve this.
3. The Top-Shell Crunch
Shell shatters → sends fragments at your hand or eyes.
Caused by:
- dull knife
- wrong tip shape
- brute force on delicate oysters
This is why matching your knife to your oyster type matters.
THE 5 BEGINNER MISTAKES (AND HOW TO FIX THEM)
Mistake #1 — Stabbing the Hinge
Fix:
Enter the hinge gently, with a controlled downward angle. Don’t stab. Settle.
Mistake #2 — Using Too Much Force
Fix:
Twist, don’t push. Force breaks oysters. Technique opens them.
Mistake #3 — Holding the Knife Like a Chef Knife
Fix:
Grip closer to the handle’s core. Keep your thumb anchored.
Mistake #4 — Not Stabilizing the Oyster
Fix:
Use a towel or board. Stability = safety + leverage.
Mistake #5 — Rushing
Fix:
Slow down. Fast comes later.
CHAPTER 11 — WHAT NOT TO BUY
The tools that work against you.
There are oyster knives worth every penny — and there are knives that exist only to make shucking harder, messier, and more dangerous.
Here’s what to avoid.
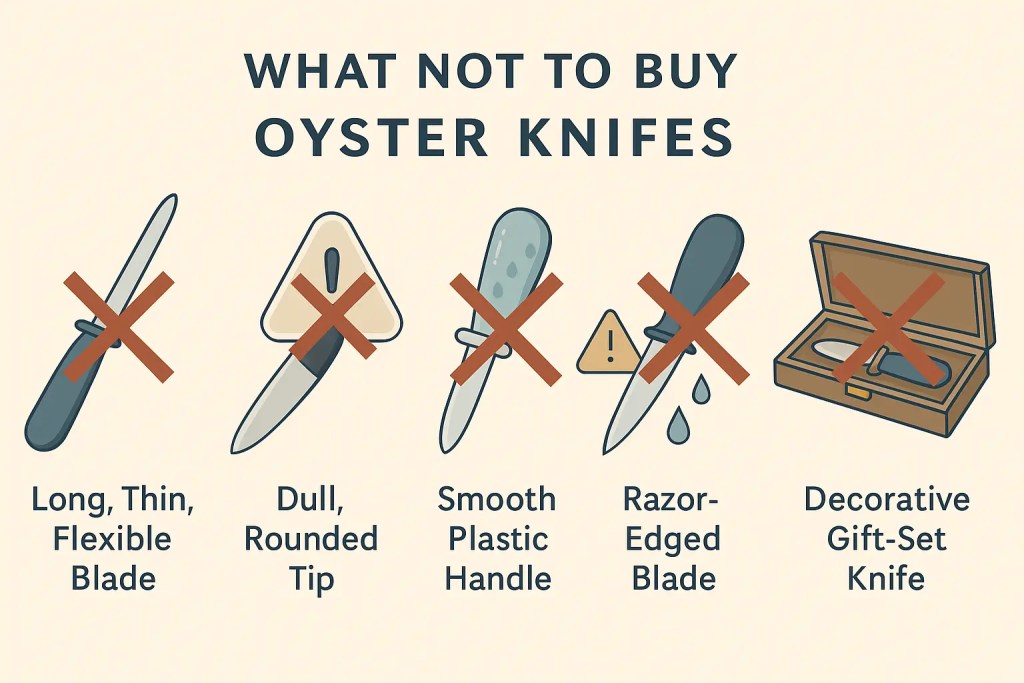
1. Long, Thin, Flexible Blades
These are NOT oyster knives.
They’re clam knives or cheap imitations.
They:
- flex too much
- slip easily
- offer no leverage
- break hinges
Hard pass.
2. Dull, Rounded Tips
A dull oyster knife isn’t safer — it’s more dangerous.
It requires more force → more slips → more injuries.
3. Smooth Plastic Handles
When wet, these become ice cubes.
You want texture, contour, or rubberization.
4. Gimmick Knives with Razor Edges
Some brands sharpen oyster knife blades like chef knives — a massive mistake.
They:
- slice hands
- damage oysters
- cut too deeply
Oyster knives should define, not cut.
5. Decorative Gift-Set Knives
They look good in a wooden box.
They perform terribly in real life.
Save these for display. Not for shucking.
CHAPTER 12 — RAW BAR REALITY
Stories, rhythm, pressure, and the craft behind the craft.
You can learn technique from a video.
You can learn anatomy from a diagram.
But you learn shucking from moments like these:
- The first oyster that fights you back.
- The tenth oyster you open cleanly in a row.
- The Saturday night rush where your knife becomes an extension of your hand.
- The oyster that pops so cleanly you barely feel it.
- The oyster that reminds you how strong the sea really is.
A raw bar is a living thing.
Crowds lean in, conversations hum, ice melts, shells stack up, and your knife moves with steady assurance.
When your tool is right, and your grip is right, the work becomes almost meditative.
That’s the truth behind the craft:
Shucking is strength.
Shucking is finesse.
patience.
rhythm.
respect.
This chapter of reality is what separates someone who “opens oysters” from someone who understands oysters.
And once you feel that difference — you never go back.
CHAPTER 13 — THE FINAL VERDICT
Three knives that rule them all, and the one that belongs in your kitchen.
Now that you’ve seen the anatomy, technique, styles, regional approaches, oyster types, safety protocols, and the full Elite 8 breakdown, it’s time for the simplest truth in this entire Bible:
There is no single “best” oyster knife in the world —
but there IS a best knife for you.
So here is the unmistakable, chef-approved Final Verdict, distilled down to the only choices that truly matter.
CHAPTER 14 — FAQ
The most searched questions about oyster knives — answered with expertise.
1. What is the best oyster knife for beginners?
The OXO Good Grips Oyster Knife offers the safest, most comfortable entry point for new shuckers. Its grip and blade shape help prevent slips and injuries.
2. What knife do professionals use to shuck oysters?
Most professional raw bars use the Dexter-Russell New Haven oyster knife for its durability, hinge accuracy, and speed. Many chefs also upgrade to the Messermeister for premium performance.
3. Is there a difference between oyster knives?
Yes. Blade shape, tip angle, handle design, stiffness, and length can drastically change leverage, control, and safety. Different knives excel with different oyster species.
4. What is the safest way to open an oyster?
Stabilize the oyster on a towel or board, insert the knife gently at the hinge, twist (don’t push), and lift the top shell cleanly. Wearing a cut-resistant glove adds additional safety.
5. What is the best knife for East Coast oysters?
The Messermeister and Dexter-Russell New Haven knives are ideal for thick shells and heavy hinges common in Atlantic varieties.
6. What is the best knife for West Coast oysters?
The F. Dick 3-inch oyster knife excels with Kumamotos, Olympias, and deep-cupped shells due to its precision tip and narrow blade.
7. Can I use a regular knife to open oysters?
No. Regular knives are dangerous and can easily slip or break. Oyster knives are designed for controlled leverage and safety.
8. Why do some oyster knives have curved tips?
Curved (New Haven) tips help naturally find and pop the hinge with minimal force, especially for East Coast oysters.
9. Do oyster knives get dull?
They don’t “cut,” so dullness is different — but tips can wear down and edges can smooth out with heavy use. Most oyster knives last years without sharpening.
10. What should I avoid when buying an oyster knife?
Avoid long, flexible blades, smooth plastic handles, sharpened edges, and decorative gift-set knives. These are either unsafe or ineffective.
THE RAW BAR BIBLE CLOSES
Skill, steel, and respect for the shell.
Shucking oysters is one of the purest acts in food — a blend of technique, touch, confidence, and an understanding of the sea itself.
And the tool in your hand determines everything.
A great oyster knife isn’t just a utensil.
It’s an anchor.
A lever.
A partner.
A teacher.
A safeguard.
A symbol of respect for the shell and the creature inside it.
Whether you’re opening a single oyster at home, feeding friends from a platter of crushed ice, or running a raw bar on a Saturday night, the right knife transforms the experience from struggle… into craft.
If this Bible has taught you anything, let it be this:
Choose your knife with intention.
Shuck with confidence.
Respect the oyster.
Honor the craft.
This is the gospel of steel and shell —
and now it belongs to you.
Ready to upgrade your shucking? These are the only knives worth owning:
Buy Once. Shuck Forever.
The four oyster knives that actually deserve a spot in your kitchen or on your raw bar.
Best Overall — Messermeister Oyster Knife
Surgical stainless steel build with a thumb-fin grip that gives unmatched control, torque, and hinge power on any oyster.
View on AmazonQuick Match Guide
- Best all-rounder: Messermeister Oyster Knife
- Best budget starter: OXO Good Grips Oyster Knife
- East Coast workhorse: Dexter-Russell New Haven
- Best for delicate West Coast oysters: F. Dick 3-Inch Oyster Knife
Best Value — OXO Good Grips Oyster Knife
Excellent comfort and durability for the price. A forgiving, non-slip handle makes this the perfect first serious oyster knife.
View on Amazon
Best Pro Tool — Dexter-Russell New Haven
The raw-bar industry standard. The New Haven tip seats cleanly in the hinge and the Sani-Safe handle grips even when wet.
View on Amazon
Best Precision — F. Dick 3-Inch Oyster Knife
A scalpel-like tapered blade designed for Kumamotos, Olympias, and fragile deep-cupped West Coast oysters.
View ProductDiscover more from The Oyster Encyclopedia
Subscribe to get the latest posts sent to your email.