

Storing oysters correctly is essential to maintaining their freshness, flavor, and safety. In this guide, we’ll show you how to store oysters so they stay in peak condition until you’re ready to enjoy them. Whether you’re a seafood lover or preparing for a special meal, understanding the best methods for oyster storage ensures that your bivalves remain safe, delicious, and full of their briny goodness. Let’s dive into the essential tips and techniques for preserving oysters at their freshest.
The Importance of Proper Oyster Storage
Proper oyster storage prevents spoilage and reduces waste. Oysters perish quickly without the right conditions. Keeping them at the correct temperature and humidity extends their shelf life, helping you enjoy fresh oysters longer while minimizing waste.
Storing oysters correctly also preserves their fresh, briny flavor. Fresh oysters lose their quality quickly if exposed to air or improper conditions. By maintaining the right storage methods, you ensure your oysters stay juicy, flavorful, and ready for any meal.
Safe storage protects your health by minimizing harmful bacteria growth. Proper storage keeps oysters safe and nutrient-rich. Using sustainable storage methods also helps reduce waste and supports environmental efforts to protect oyster populations.

Selecting Fresh Oysters for Storage
Begin with the freshest oysters possible. Look for:
- Closed shells: Live oysters have tightly closed shells. A slightly open shell may close when tapped; if it doesn’t, discard the oyster.
- A sea-fresh scent: Fresh oysters should smell like the ocean, not fishy or sour.
- Weight: Oysters that feel heavy likely contain plenty of water, which indicates they’re alive and healthy.
Only purchase oysters from reputable sources and inspect them carefully before storing them.
Dive into our Ultimate Guide to Selecting Premium Oysters and elevate your shellfish game today!
Ideal Temperature and Humidity Conditions
Oysters need to be stored in a cold environment. Aim to keep them between 35°F and 40°F (1.5°C – 4°C). Use a thermometer to ensure your fridge stays within this range. Humidity should be high, as oysters need a moist environment to remain fresh, but they should never be submerged in water.

Practical Tip:
Place a shallow tray of water in the refrigerator to maintain a humid atmosphere without overexposing the oysters to moisture.
Want the full picture?
The Raw Bar Bible
A deeper look into oysters, shucking technique, brine, knife choice, and real raw bar workflow — written from a chef’s point of view. Clear, practical, and built from actual service experience.
Best Storage Containers and Materials for Oysters
Choosing the right storage containers is essential for keeping oysters fresh and maintaining their quality. Oysters need a breathable environment to stay alive and flavorful, so the type of container you use can make a big difference. Here are the best storage containers and materials for oysters:
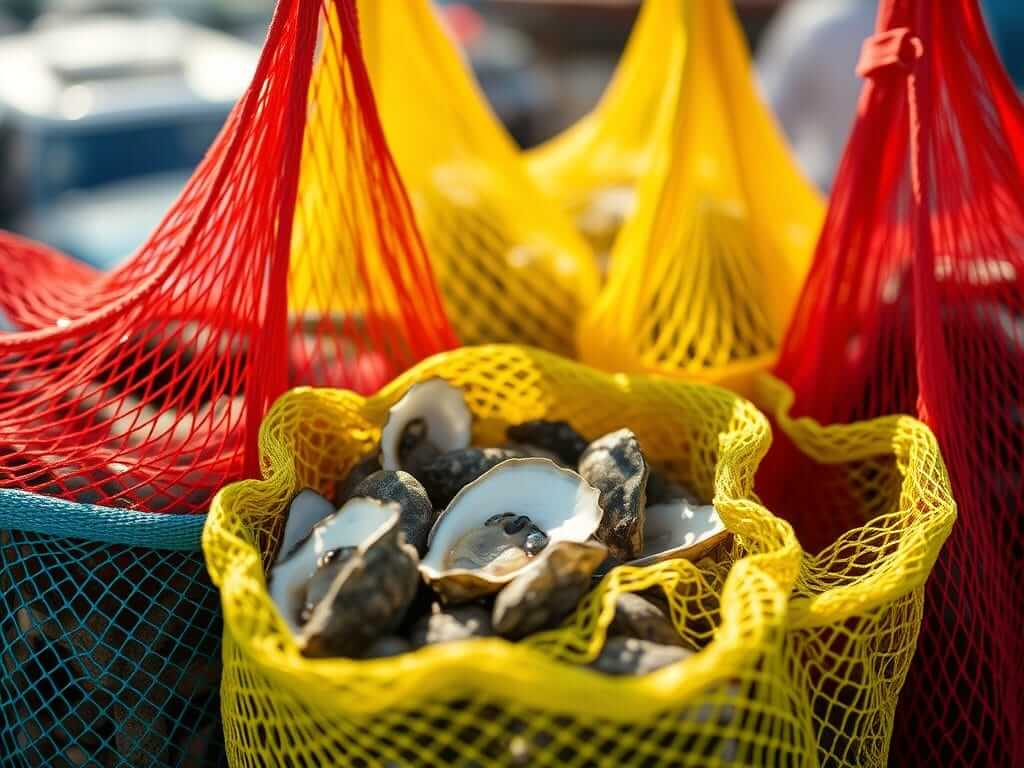
1. Mesh Bags
Mesh bags are ideal for storing oysters because they allow plenty of airflow while keeping the oysters contained. These bags mimic the natural environment oysters live in, ensuring they remain moist without being waterlogged. The open structure of a mesh bag helps oysters stay fresh by preventing any buildup of excess moisture, which can lead to spoilage.
2. Breathable Baskets
If you prefer a more solid option, breathable baskets work well for oyster storage. These baskets should have gaps or holes to allow air circulation, keeping the oysters in a well-ventilated space. Line the basket with a damp cloth to maintain moisture, but avoid sealing the basket with a tight-fitting lid, as this can restrict airflow and lead to faster deterioration.
3. Shallow Trays
Shallow trays provide another excellent option for oyster storage, especially if you’re placing them in the fridge. When using trays, make sure the oysters are not stacked on top of one another, as this can cause the shells to crack or break. Place the oysters in a single layer and cover them with a damp towel to retain moisture. A perforated or slotted tray works best, as it allows any excess water to drain away, preventing the oysters from sitting in a pool of water.
4. Reusable Containers with Vents
If you’re looking for an eco-friendly option, consider using reusable containers with ventilation. These containers often come with adjustable vents that allow you to control airflow. By keeping the vents open, you can maintain the right level of air circulation while preventing the oysters from drying out. Just make sure to avoid containers that are completely sealed, as oysters need oxygen to stay alive.
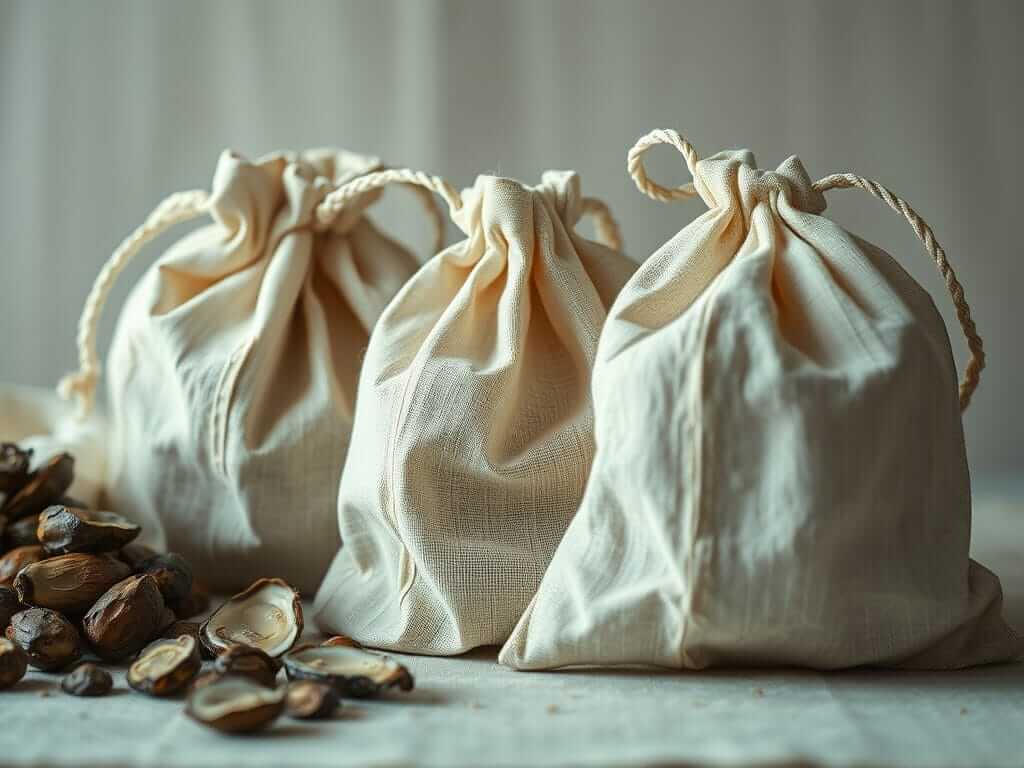
5. Cloth Bags
A simple, natural option is a cloth bag. Similar to mesh bags, cloth bags allow for air circulation and moisture retention without trapping excess water. These bags are especially useful if you plan to store oysters for only a short period, as they keep them fresh without restricting airflow.
What to Avoid:
- Airtight Containers: Oysters need to breathe, so avoid using containers with tight-fitting lids. Airtight containers trap moisture and suffocate the oysters, leading to spoilage.
- Plastic Bags: While convenient, plastic bags can trap too much moisture and don’t provide enough airflow. This can cause the oysters to sit in their own liquid, promoting bacterial growth and affecting flavor.
By choosing the right storage container, you ensure your oysters stay fresh, flavorful, and safe to eat, all while maintaining the ideal moisture and ventilation conditions they need. However, the sooner they are consumed, the better the flavor and texture. Always check their health before consuming.
5 Tips for Storing Oysters at Home
1. Position Oysters Cupped-Side Down
Always store oysters with the cupped side facing down. This simple yet important tip helps the oysters retain their natural juices, which are crucial for keeping them moist and flavorful. The cupped side of the shell is designed to hold liquid, and storing oysters this way ensures that they don’t dry out. This method also helps mimic their natural position in the wild, where the cupped side is usually buried in the sand or attached to surfaces, further protecting the delicate meat inside. By storing oysters cupped-side down, you can maximize their freshness and preserve the briny flavor that makes them so desirable.
2. Use a Damp Cloth or Towel
Oysters need moisture to stay alive and fresh, but they shouldn’t be waterlogged. Cover your oysters with a damp cloth or towel to maintain the right balance of moisture. The cloth should be damp, not soaking wet, as too much water can suffocate the oysters and accelerate spoilage. A damp towel provides just enough humidity to keep the oysters from drying out while still allowing airflow, which is essential for their survival. Be sure to check the towel every day and re-dampen it if necessary, ensuring the oysters remain in a moist, comfortable environment.
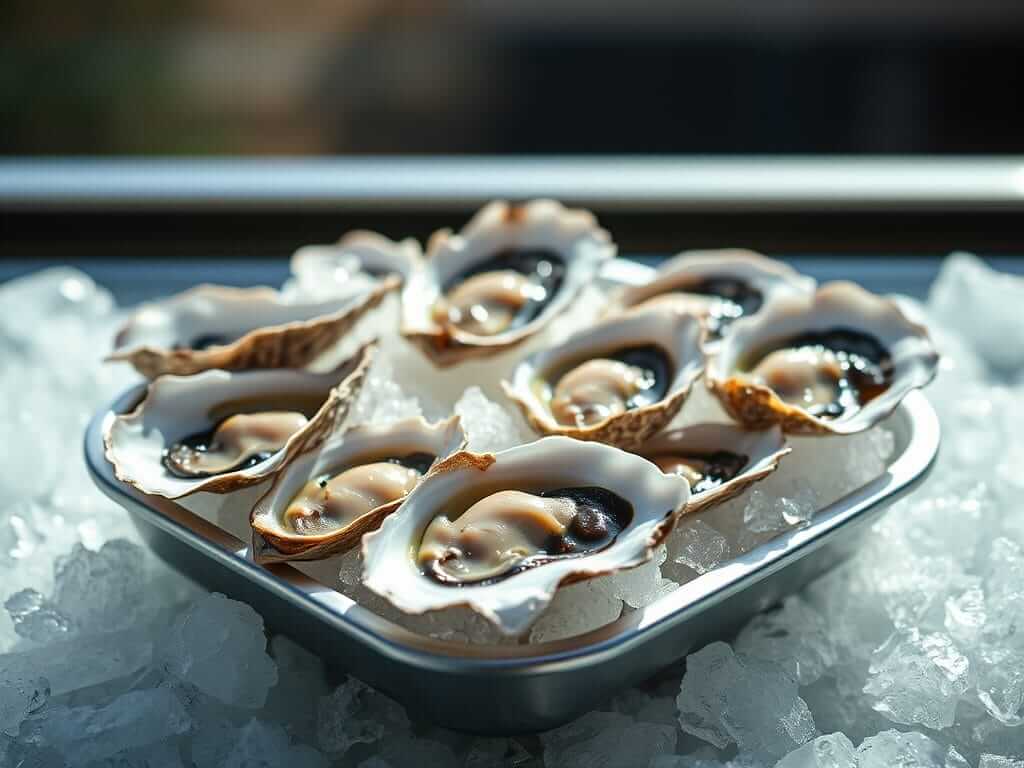
3. Avoid Water Submersion and Ice
One of the most common mistakes when storing oysters is submerging them in water or placing them directly on ice. Never submerge oysters in water, as this can drown them. Oysters breathe through their shells, and too much water can prevent them from getting the oxygen they need to stay alive. Similarly, storing oysters directly on ice can freeze the delicate meat inside the shells, damaging their texture and flavor. Instead, place oysters on a chilled tray or in a container that allows proper drainage. You can keep ice nearby to lower the temperature, but make sure any melted water drains away, keeping the oysters above the moisture.
4. Check Oyster Health Regularly
While oysters can be stored for several days, it’s important to regularly check their health during storage. To do this, lightly tap any open shells. If the shell closes, the oyster is still alive and safe to eat. If it remains open, the oyster has died and should be discarded. Dead oysters pose a risk of bacterial contamination, so never consume them. Additionally, trust your senses—if an oyster develops a foul, fishy odor, it’s a clear sign of spoilage. Fresh oysters should smell clean and slightly briny, like the ocean. Regular inspections will help ensure that the oysters you serve are safe and fresh.
5. Stick to a Maximum Storage Duration
Even with the best storage methods, oysters have a limited shelf life. Live oysters can typically be stored in the fridge for up to seven days if kept at the right temperature (35°F – 40°F) and with proper ventilation. However, the fresher the oysters are when consumed, the better they will taste. For shucked oysters, the storage window is much shorter. Shucked oysters should be consumed within two days of storage. Beyond these timeframes, the risk of spoilage increases, and the quality of the oysters declines. Always prioritize consuming oysters as soon as possible to enjoy their full flavor and texture.
Storing Shucked Oysters
Shucked oysters, or oysters that have been removed from their shells, require special care during storage to maintain freshness, flavor, and safety. Since shucked oysters are more exposed to air and bacteria than live oysters in their shells, proper storage becomes even more crucial. Here’s how to store shucked oysters to keep them fresh and safe to eat:
1. Refrigerate Immediately
As soon as oysters are shucked, they should be placed in the refrigerator right away. The ideal temperature for storing shucked oysters is between 32°F and 35°F (0°C – 1.5°C), which is slightly colder than the temperature used for live oysters. This helps slow bacterial growth and keeps the oysters at their peak freshness. Be sure to check the temperature of your fridge and adjust it as needed to keep the oysters within this narrow range. You can also get more information on proper refrigeration temperatures from Louisiana Sea Grants website here!

2. Store in Their Own Liquid
When shucking oysters, it’s important to save the natural liquid, or “liquor,” that comes out of the shell. This briny liquid helps preserve the flavor and texture of the oysters. Place the shucked oysters in a clean, airtight container and pour the liquor over them. The liquid will act as a protective barrier, preventing the oysters from drying out and helping to maintain their fresh, ocean-like flavor.
3. Use a Sealed, Airtight Container
Unlike live oysters, which need airflow, shucked oysters should be stored in a sealed, airtight container. This keeps them from being exposed to air, which can cause them to spoil faster. Make sure the container is clean and properly sealed to avoid any cross-contamination with other foods in your refrigerator. Keeping the container tightly closed also helps maintain the natural moisture of the oysters and prevents them from absorbing any odors from other items stored in the fridge.
4. Limit Storage Time
Shucked oysters have a much shorter shelf life than live oysters in their shells. Ideally, you should consume shucked oysters within 1 to 2 days of shucking them. While it’s possible to store them for a bit longer in the refrigerator, their quality and flavor will start to decline after this period, and the risk of spoilage increases. It’s always best to plan to use shucked oysters as soon as possible for the best taste and safety.
5. Avoid Freezing Shucked Oysters
Freezing shucked oysters is an option, but it’s not ideal if you want to preserve their fresh, plump texture. While freezing will extend their shelf life, the freezing and thawing process can negatively affect the oyster’s consistency, making them softer and less firm. If you do need to freeze them, make sure they are stored in their liquor in an airtight container, and only use them in cooked dishes where the texture change won’t be as noticeable. However, for the best flavor and texture, it’s recommended to enjoy shucked oysters fresh rather than frozen.
6. Rinse Before Use
Before consuming or cooking shucked oysters, give them a gentle rinse in their own liquid. This helps remove any residual shell fragments or debris that may have been left during the shucking process. Do not rinse them under fresh water, as it can dilute their flavor and strip away the briny essence that makes oysters so delicious.
Signs of Spoilage to Watch For
Recognizing the signs of spoilage is critical for ensuring the oysters you consume are safe. Fresh oysters, whether live or shucked, should exhibit certain characteristics that indicate they’re in good condition. Any deviation from these signs can mean the oysters have spoiled, making them unsafe to eat. Here are the most common indicators that oysters have gone bad.
1. Unpleasant Odor
One of the clearest signs of oyster spoilage is an off or unpleasant odor. Fresh oysters should smell clean and briny, like the ocean. If you notice a strong, fishy, sour, or rotten smell, this is a clear sign that the oysters are no longer fresh and should be discarded. Spoiled oysters can harbor harmful bacteria that are not visible to the naked eye, so always trust your sense of smell first. If anything smells off, it’s better to be cautious and avoid eating them.
(For more information on oyster spoilage and food safety, visit the USDA’s food safety guidelines.)
2. Open Shells That Don’t Close
For live oysters still in their shells, an open shell can indicate that the oyster has died. Live oysters will close their shells tightly when tapped. If an oyster remains open or doesn’t close when tapped, it is no longer alive and should be discarded immediately. Additionally, if the shell feels unusually light or empty, this may be a sign that the oyster has lost its internal moisture and is no longer viable. Dead oysters are unsafe to eat and can harbor harmful bacteria, making them a health risk.
(Learn more about proper shellfish handling at the FDA’s seafood safety page).
3. Dry or Shriveled Meat
Spoiled oysters will often have a dry, shriveled appearance. Fresh oyster meat should be plump, moist, and glossy. If the oyster looks dried out or appears to have shrunk within the shell, this indicates that it’s no longer fresh. Shucked oysters, in particular, should be juicy and bathed in their natural liquor. A lack of moisture in the meat or a shriveled texture is a strong indication that the oysters have gone bad and should not be consumed.
Preparing Stored Oysters for Consumption
Once you’ve properly stored your oysters, whether live or shucked, preparing them for consumption requires a few key steps to ensure they’re safe, clean, and delicious. Proper preparation helps preserve the fresh, briny flavor of the oysters while minimizing the risk of contamination. Here’s how to prepare both live and shucked oysters for eating:

1. Cleaning Live Oysters
Before you shuck live oysters, it’s important to clean the shells thoroughly. Oysters can have dirt, debris, or sand on the outer shells, and you don’t want any of that getting into the meat during shucking. To clean live oysters:
- Rinse under cold water: Run each oyster under cold tap water, using a brush or sponge to scrub the shells clean. Make sure you remove any mud, algae, or small barnacles that may be attached to the shells.
- Avoid using soap or chemicals: Never use soap, detergents, or other cleaning agents on oysters, as these can seep into the meat and contaminate the flavor.
- Check for dead oysters: During cleaning, check each oyster by tapping on the shell. If an oyster remains open after being tapped, discard it, as it is likely dead.
2. Shucking Live Oysters
Shucking live oysters can be tricky, but with the right tools and technique, you can safely open the shells without damaging the oyster meat inside. Here’s how to do it:
- Use an oyster knife: A dedicated oyster knife is essential for shucking. It’s designed with a short, sturdy blade that can safely pry open the tough shell.
- Wear a shucking glove or use a towel: To avoid injury, wear a protective glove on the hand holding the oyster or wrap a kitchen towel around it for grip and safety.
- Insert the knife at the hinge: Hold the oyster with the cup side down and insert the knife into the hinge (the narrow, pointed end of the shell). Gently twist the knife to pop the shell open.
- Sever the muscle: Once the shell opens, run the knife along the top shell to sever the muscle that holds the oyster together. Carefully remove the top shell, making sure not to spill the oyster’s natural juices (liquor).
Shucked oysters can be eaten raw or prepared for cooking. If you’re serving them raw, ensure you present them on a bed of crushed ice to keep them cool and fresh.
Looking to master the art of shucking oysters? Check out our detailed post on how to shuck oysters for step-by-step instructions, expert tips, and safety advice. Perfect your technique and enjoy fresh oysters with confidence!
3. Rinsing Shucked Oysters
Shucked oysters, whether freshly shucked or purchased pre-shucked, should be rinsed briefly before consumption. Here’s how:
- Rinse in their own liquor: If you’ve shucked the oysters yourself, rinse them gently in the oyster liquor (the natural briny liquid they release). This helps remove any bits of shell or debris without diluting their flavor.
- Avoid fresh water: Don’t rinse oysters under tap water, as this can wash away the flavorful briny taste and affect their texture.

If you’ve purchased pre-shucked oysters, drain and briefly rinse them in their liquor if available. If they came without it, you can lightly rinse them under cold, filtered water, but keep the rinsing quick to preserve flavor.
4. Inspecting Before Eating
Before consuming any oyster, whether raw or cooked, give them one final inspection to ensure they are safe to eat:
- Smell the oysters: Fresh oysters should have a clean, briny scent, reminiscent of the ocean. If you detect any foul or fishy odors, discard the oysters immediately.
- Check the texture: Fresh oysters should be plump, firm, and moist. If the oyster meat looks shriveled, dry, or has a slimy texture, it’s a sign of spoilage, and it’s best to throw it out.
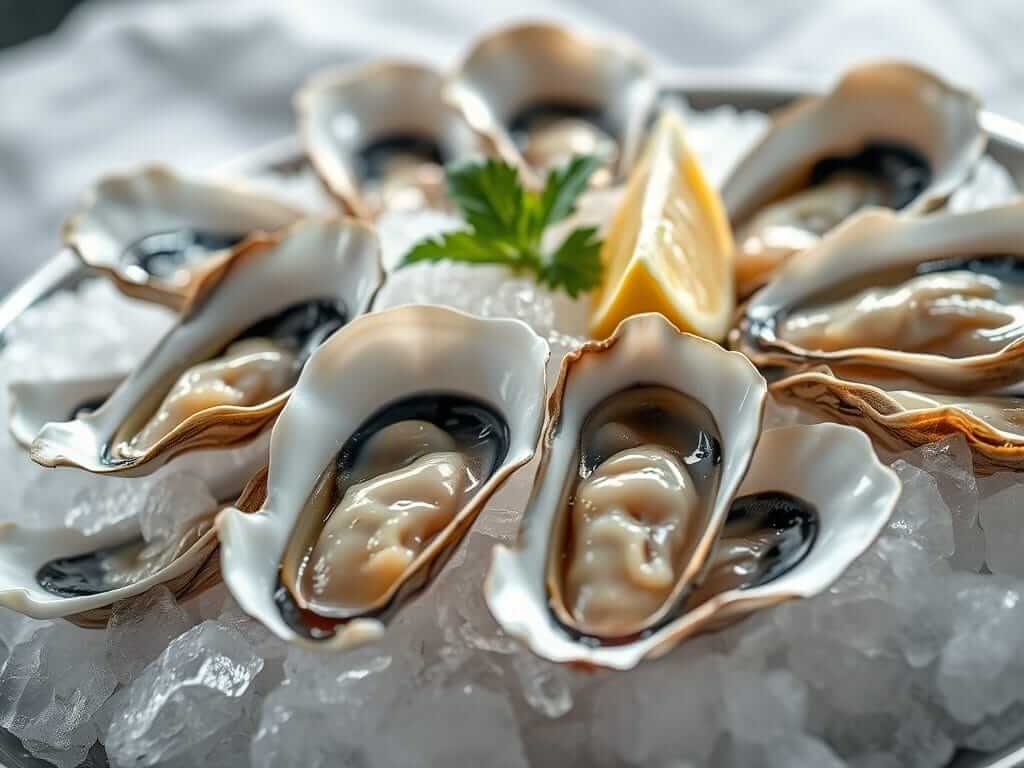
5. Serving Raw Oysters
If you’re serving oysters raw on the half-shell, presentation and temperature are key. Here’s how to do it right:
- Serve on ice: Arrange the oysters on a bed of crushed ice to keep them chilled and fresh during serving. This also adds an elegant presentation.
- Garnish with lemon or sauces: Many enjoy raw oysters with a squeeze of lemon, mignonette sauce, or cocktail sauce. Serve these on the side so guests can customize to their taste.
6. Preparing Oysters for Cooking
If you plan to cook your stored oysters, there are many delicious options, and preparing them properly ensures the best results:
- Drain excess liquid: For cooked dishes, drain the oysters of any excess liquid if necessary. Reserve the liquid (oyster liquor) for adding briny flavor to soups, stews, or sauces.
- Choose your cooking method: Oysters can be baked, grilled, fried, steamed, or added to soups. For dishes like oyster stew or chowder, shucked oysters are ideal. If grilling or baking oysters in the shell, you can pre-shuck them and top them with butter, breadcrumbs, and herbs.
Cooking oysters kills any potential bacteria and enhances their flavor. Popular dishes include oyster Rockefeller, fried oysters, or oyster stew.
7. Thawing Frozen Oysters
If you’ve stored your oysters in the freezer, proper thawing is essential:
Inspect before use: After thawing, inspect the oysters for any signs of spoilage, such as an off smell or unusual texture.
Thaw in the fridge: Always thaw frozen oysters slowly in the refrigerator overnight. This preserves their texture better than quicker methods like microwaving or running them under warm water, which can make them mushy.
Freezing Oysters: Pros and Cons
Freezing oysters can be a convenient way to extend their shelf life, but it comes with both advantages and drawbacks. While freezing can preserve the oysters for future use, it does affect their texture and flavor. Here’s a deeper look at the pros and cons of freezing oysters, whether you’re storing them live, in the shell, or shucked.
Pros of Freezing Oysters
Extended Shelf Life: Freezing allows oysters to last up to three months, helping reduce waste and providing convenience.
Great for Cooking: Frozen oysters retain their flavor in cooked dishes, making them perfect for stews, soups, or casseroles.
Prevents Waste: Freezing leftover oysters saves them for future use, reducing the risk of spoilage.
Cons of Freezing Oysters
Textural Changes: Freezing causes oysters to become softer and mushy, making them less ideal for raw consumption.
Loss of Briny Flavor: The natural oceanic taste may be muted after freezing, especially when eaten raw.
Limited Freezing Options: Freezing live oysters in their shells can cause cracking, and shucked oysters need proper storage in an airtight container.
Thawing Challenges: Oysters must be thawed in the refrigerator, requiring time and careful planning to avoid further texture loss.
Ready to enjoy your oysters? Learn the perfect way to shuck them with ease! Check out our guide on Mastering the Art of Shucking Oysters for expert tips and step-by-step instructions.
Key Takeaways for Storing Oysters to Maintain Freshness and Flavor
Mastering the proper storage of oysters is essential for maintaining their freshness, flavor, and safety. From choosing the right storage containers to monitoring temperature and moisture, following the correct steps ensures your oysters stay alive and delicious until you’re ready to enjoy them. Whether you’re storing live oysters in the shell or shucked oysters, attention to detail will help preserve their briny flavor and plump texture, while avoiding spoilage and harmful bacteria.
When it’s time to prepare your stored oysters, cleaning, shucking, and inspecting them properly are key to a safe and enjoyable experience. Whether you’re serving them raw on the half-shell or incorporating them into a cooked dish, proper handling will allow you to enjoy oysters at their best. By following these guidelines, you’ll always be able to serve oysters that are fresh, flavorful, and safe for your next seafood feast.
Discover more from The Oyster Encyclopedia
Subscribe to get the latest posts sent to your email.